Debugging and maintenance
In this guide, you'll learn to identify and fix errors or mistakes Dasha makes. If you need help as you progress, we will be happy to aid at support@dasha.ai.
Step 0: Installing Dasha Studio (optional)
Dasha Studio is an extension to Visual Studio Code that accelerates building Dasha apps and provides advanced tools for your app's maintenance. It's an optional but highly recommended step.
Install VSCode and then install DashaStudio one of the following ways:
- Search for "Dasha Studio" in VSCode Extension View
- Run
code --install-extension dasha-ai.dashastudio - Download Dasha Studio from VSCode Marketplace
Dasha Studio consists of two primary components: Graph Editor and Profiler. It also provides syntax highlighting and IntelliSense for Dasha Script. Learn more on Dasha Studio capabilities in Debugging your app and doing maintenance.
Graph Editor
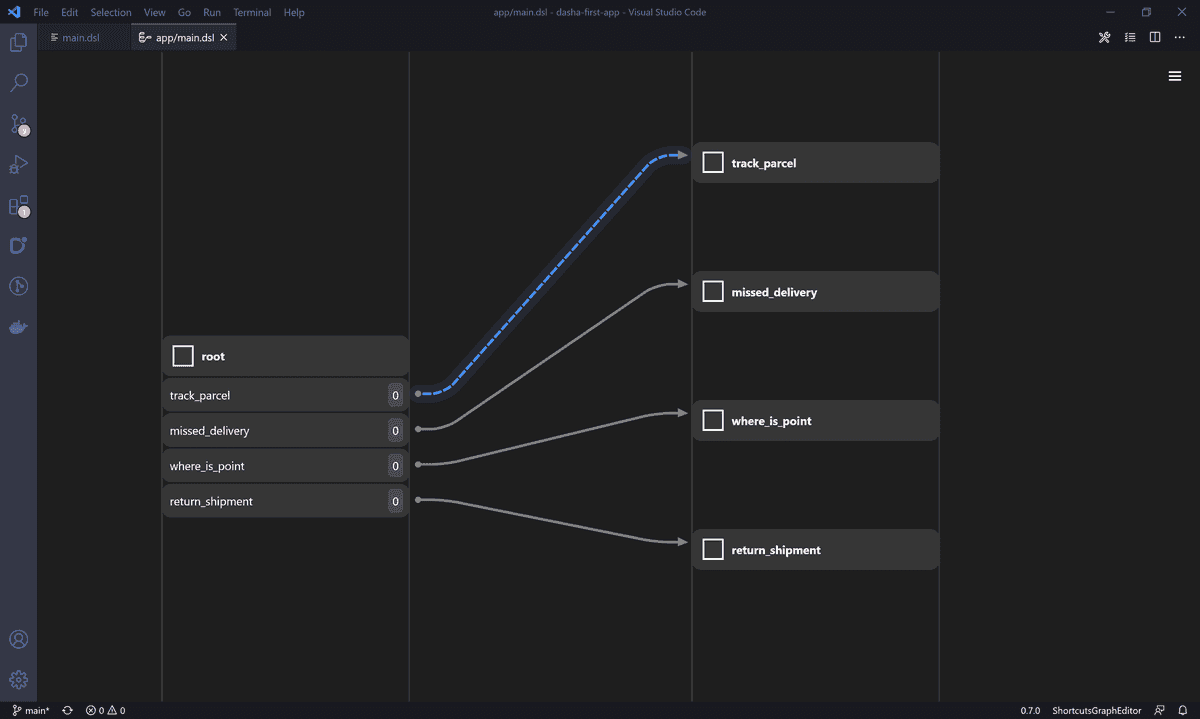
Graph editor is a low-code, WYSIWYG component that allows you to design conversation flows visually. Under the hood, the editor generates code in DashaScript.
Profiler
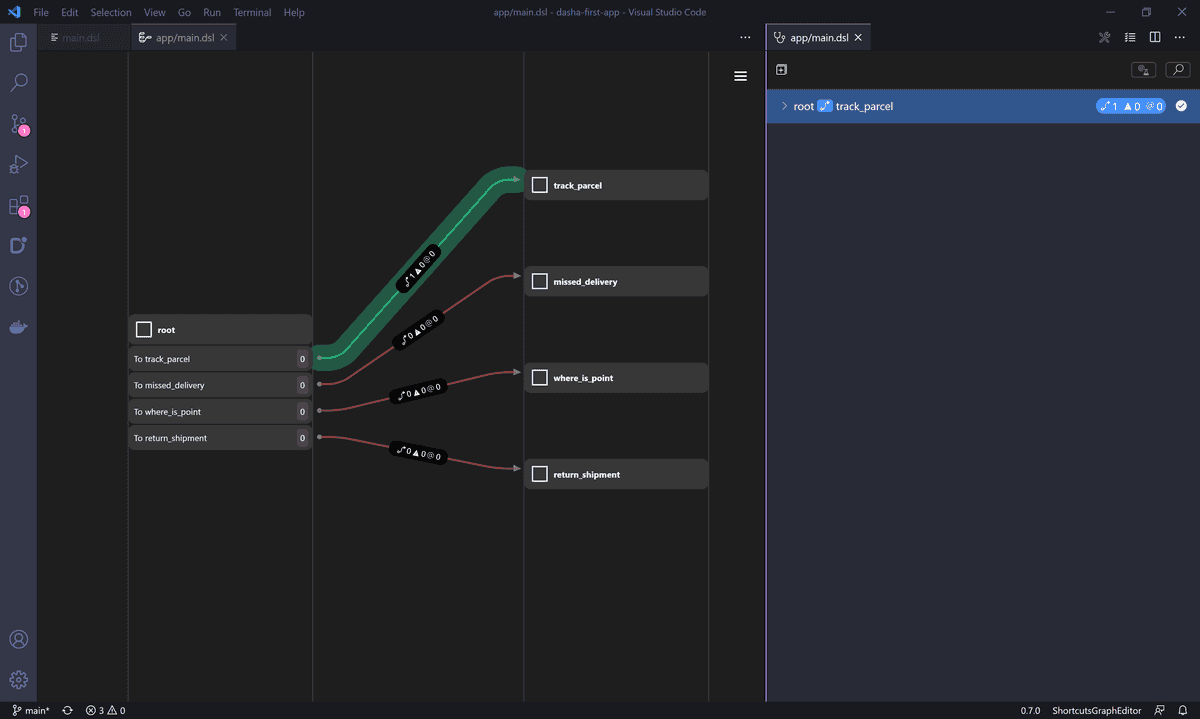
Profiler allows you to do the maintenance of your Dasha app:
- Find bugs in your intents (false-positives and false negatives)
- Analyse conversation flow (just like in web analytics)
- Find things people tell to your app, but your app cannot handle yet.
Step 1: Analyze user journey
To start the profiler, open a *.dsl file and click the stethoscope button in the toolbar:

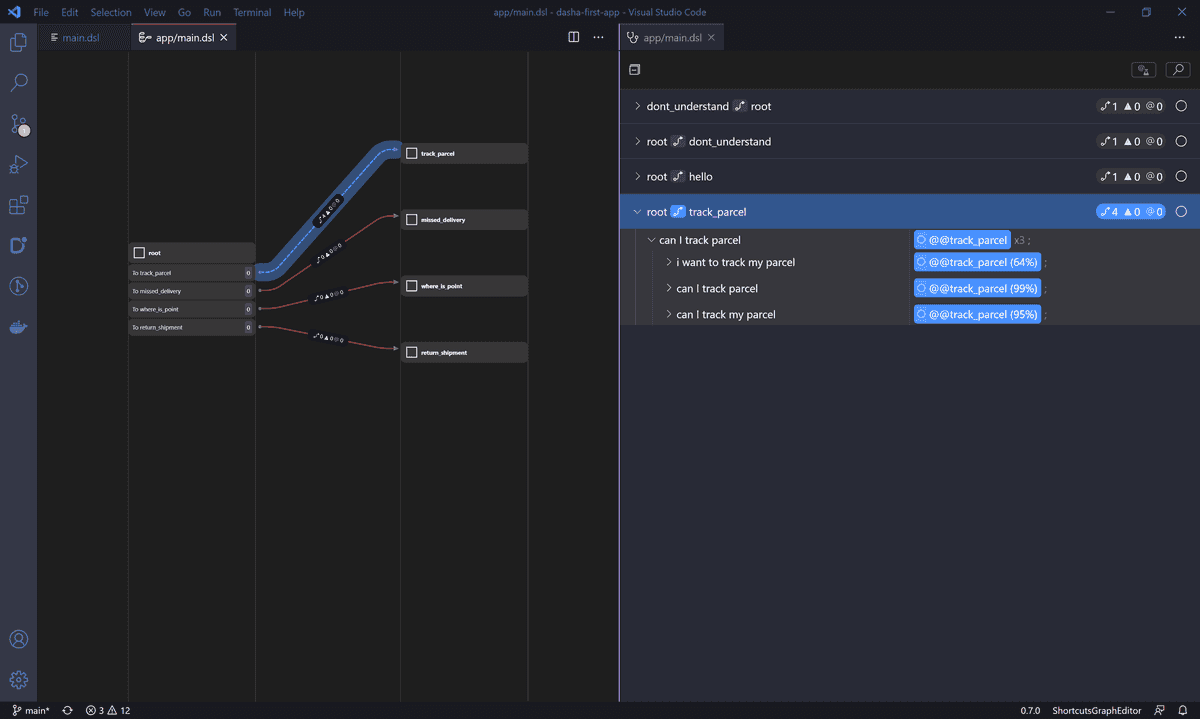
Then choose the time interval you want to analyze conversations within and click the Load button. After the profiler loaded you'll see users' journeys through your conversation flow:
Step 2: Discover and add new intents
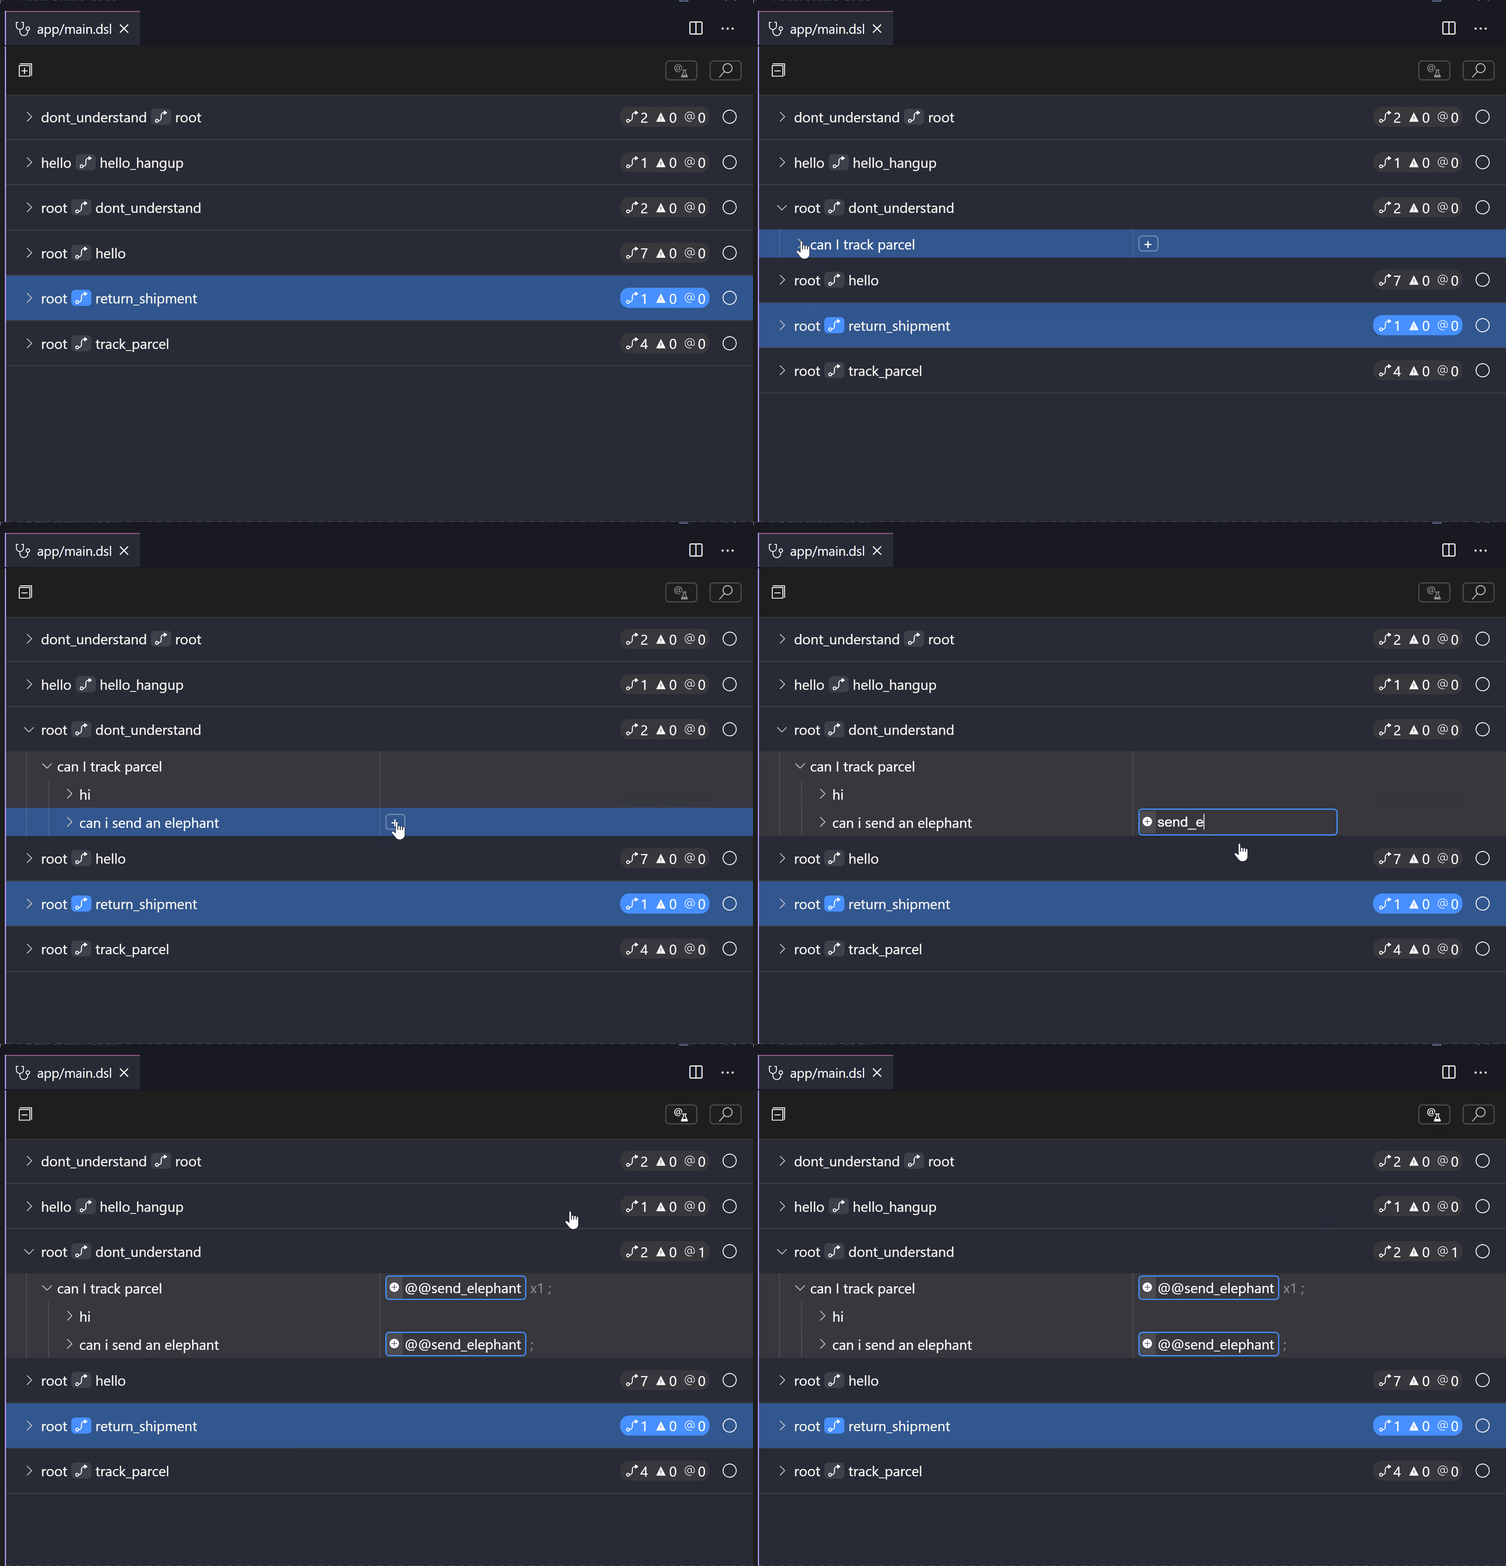
Imagine the user says something your app doesn't support yet. Like "I want to ship an elephant" in our fictional conversational IVR for postal service. How do you discover that something is missing in your app?
Go to a specific node marked with node_name -> dont_understand and expand it. You will see clusters. These are clusters of individual phrases that have been automatically clusterized by their meaning. This allows you to deal with a much smaller number of clusters vs. possibly 1,000s individual phrases (if you have a lot of conversations going through your app). Then you click + and type in the name for new intent and hit Enter. After that click the flask button in the upper right corner to apply changes:
Step 3: Add reaction to these intents
Now that you've created new intents, you may want to use them in new reactions:
send_elephant: goto send_elephant on #messageHasIntent("send_elephant");

node send_elephant
{
    do
    {
        #sayText("Sorry, sending elephants is not implemented yet.");
        #disconnect();
        exit;
    }
}
Step 4: Fix false-positives and false-negatives
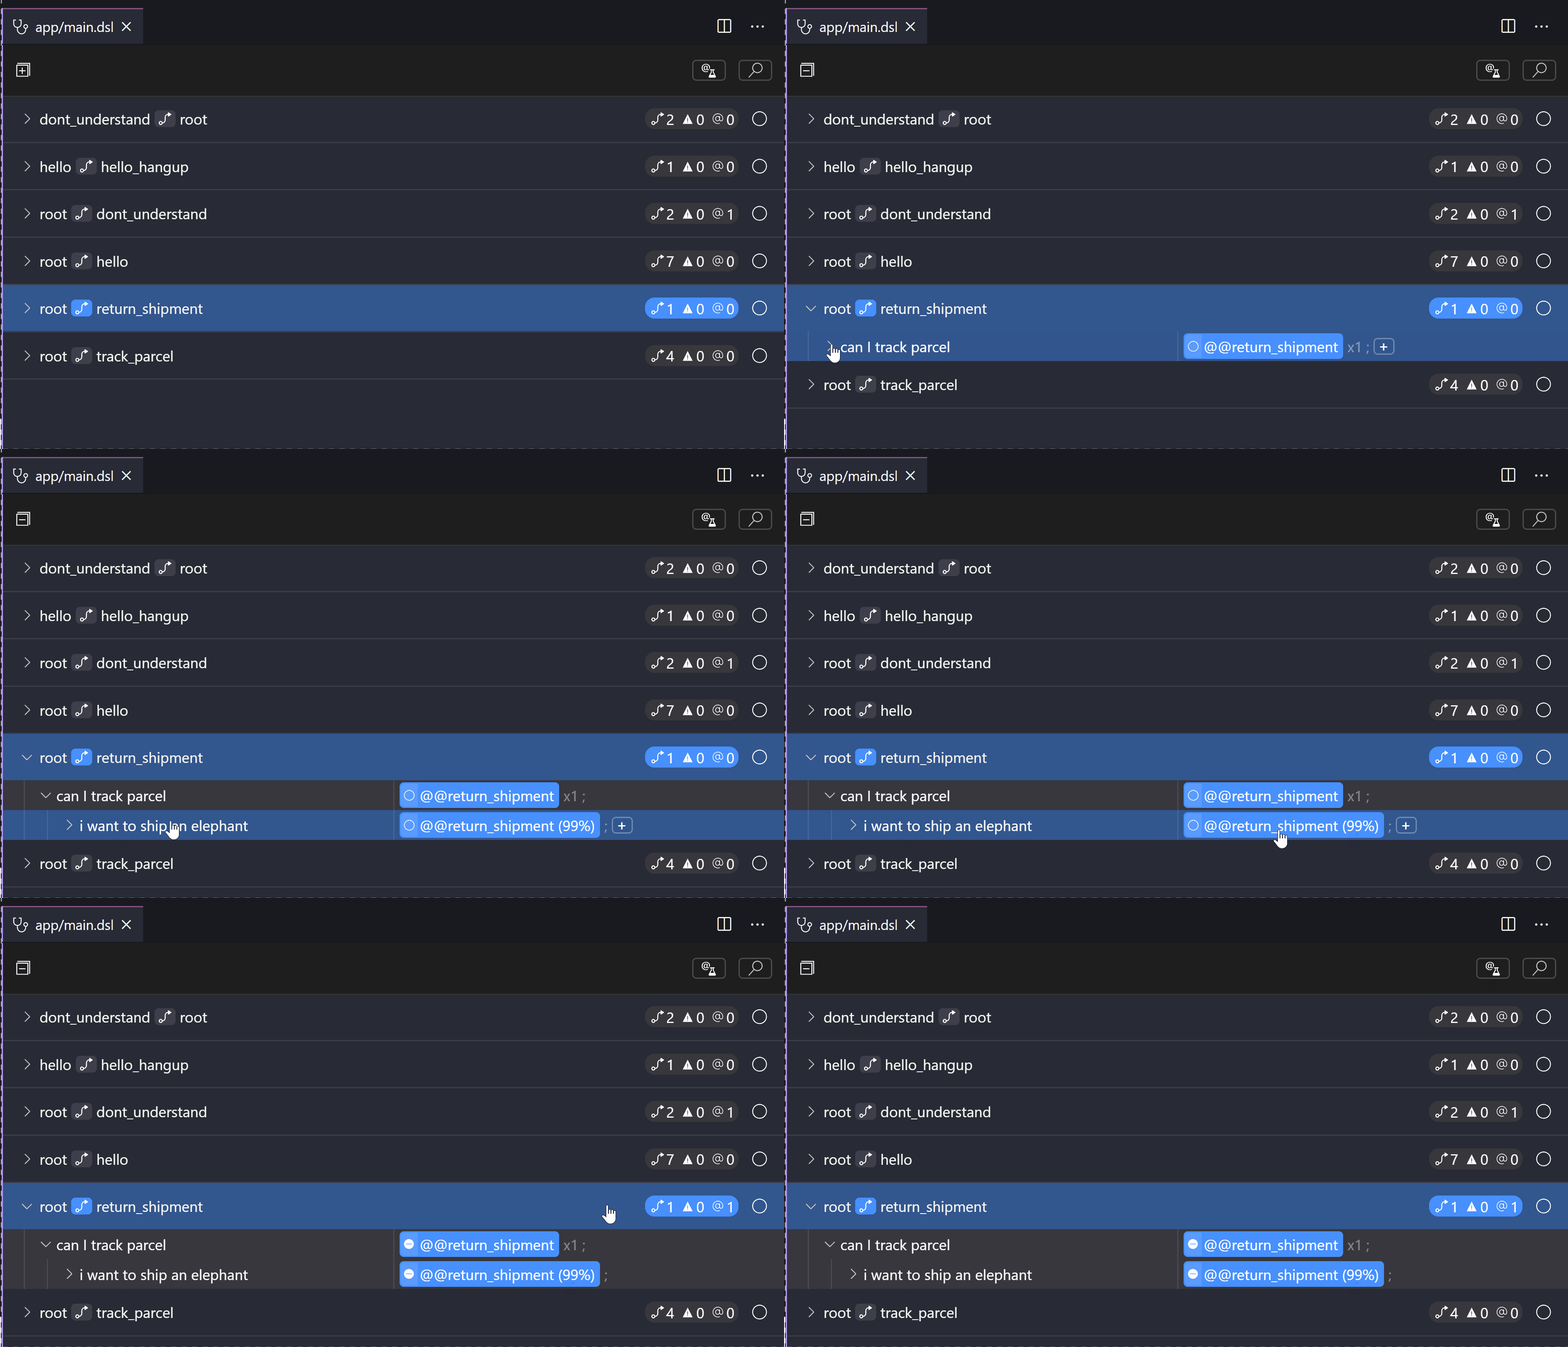
The last part of the maintenance is finding false positives. To find an FP, you need to find the corresponding phrase in the profiler and then click the circle to the left of the false-positive intent. After that apply your changes by clicking the flask button in the upper right corner:
Next up
Now that you've improved your app, here are some things you might want to see next: